Motivation
After I finished the wall cup board it was time to continue the living room furniture crafting with the high board/cupboard. The high board should consist of three parts of a size of 240cm in widht and 120cm in height. The first part of the highboard should be placed underneath the wall cupboard which was already described in a previous blogpost. Furthermore the highboard should contain a dedicated space for out Jura coffee machine.
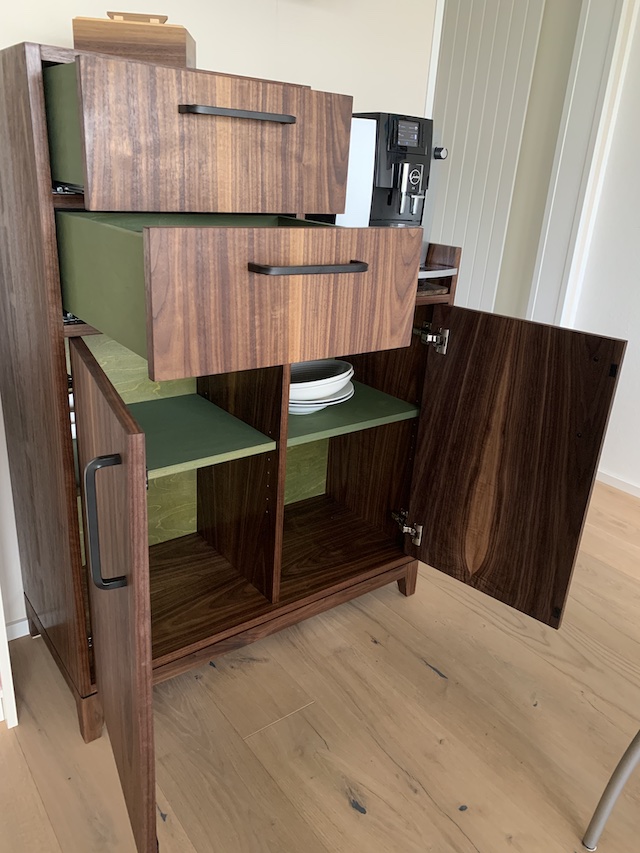
Beside the coffee machine space it should contain two drawers and two doors with space for some plates and table accessories. For building the corpus of the cupboard I did again user 18mm thick baltic birch plywood. The edges will be veneered with 2mm edge veneer and the surfaces will be veneered with american walnut veneer 0.6mm thick. I ordered the veneer from Metz Furniere in germand and the baltic birch plywood boards online from bauundhobby.ch and picked it up in a store close to where we live. whilte crafting the big cupboard I was essentially applying the techniques I learned crafring the wall cupboard but on a slightly bigger scale. In order to veneer the bis boards I used the same 30mm melamin coated boards as a veneer press but used bigger dimensions and more and bigger clamps to apply the needed pressure. Crafting that cupboard was something that is possible in my small shop. Buildint bigger ones might be a challenge because of the space and weight, since I need to get the finished piece of furniture up the stairs which can be a bit heavy.
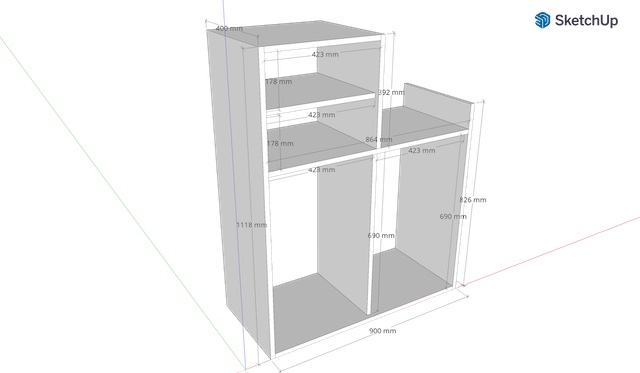
The measurements of the cupboard are 120x90x40cm and the thickness of the used boards is 18mm. I will not explain every small build step in full detail here, since I sadly forgot to take pictures of every step in the required detail. Instead I will add a sketch of the cupboard and will list a bill of material and the costs of the meaterials used.
Sketch
I did create a sketch in Sketchup. You can see the dimensions of the cupboards corpus which I used to order the substrate for veneering. The dividers between the drawsers and the doors are 20mm gapped.
Corpus/Carcass
Bill of materials (BOM)
For the build of the cupboard I have used the following material:
- Baltic birch plywood for the corpus/carcass
- Baltic birch plywood for the drawers and the shelfs
- Baltic birch plywood for the doors
- american walnut veneer
- american walnut lumber for the stand
- american walnut edge veneer 2mm thick
- Titebond Coldpress glue for veneer
- Baltic birch plywood 6mm for the backsides of the cupboard
- 4 Blum ginges
- 2 Blum drawer slides
- Handles for the drawers and doors
- Milkpaint
- Oil for the finish
Baltic birch plywood for the corpus/carcass
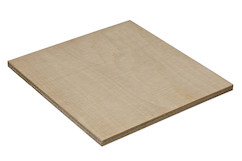
| Amount | Thickness | Length | Width |
|---|---|---|---|
| 1 | 18 mm | 810 mm | 400 mm |
| 1 | 18 mm | 690 mm | 400 mm |
| 1 | 18 mm | 1084 mm | 400 mm |
| 1 | 18 mm | 864 mm | 400 mm |
| 1 | 18 mm | 374 mm | 400 mm |
| 1 | 18 mm | 423 mm | 400 mm |
| 1 | 18 mm | 455 mm | 400 mm |
| 1 | 18 mm | 900 mm | 400 mm |
The cost for the carcas plywood was about CHF150.00 and I did buy the plywood from Coop Bau+Hobby in Switzerland.
Baltic Birch Plywood for the drawers and drawer bottoms
Drawers
| Amount | Thickness | Length | Width |
|---|---|---|---|
| 4 | 15 mm | 145 mm | 370 mm |
| 4 | 15 mm | 145 mm | 340 mm |
The cost was about CHF23.00 and I did buy the plywood from Coop Bau+Hobby in Switzerland.
Bottoms
| Amount | Thickness | Length | Width |
|---|---|---|---|
| 2 | 4 mm | 370 mm | 340 mm |
The cost was about CHF4.00 and I did buy the plywood from Coop Bau+Hobby in Switzerland.
Baltic Birch Plywood for the drawer fronts

| Amount | Thickness | Length | Width |
|---|---|---|---|
| 2 | 18 mm | 415 mm | 175 mm |
The cost was about CHF10.00 and I did buy the plywood from Coop Bau+Hobby in Switzerland.
Baltic Birch Plywood for the doors

| Amount | Thickness | Length | Widht |
|---|---|---|---|
| 2 | 18 mm | 665 mm | 415 mm |
The cost was about CHF37.00 and I did buy the plywood from Coop Bau+Hobby in Switzerland.
American Walnut veneer
I did oder a full package (24 sheets) of the veneer with the size of L X W: 3.0m x 0.33m from Metz Furniere in Gernaly. The veneer package had a cost of EUR196.40 EUR excluding tax, shippment and customs fees.
American Walnut lumber for the stand
I have already bought the board of american walnut lumber from Designholz.com.The board had a size of 120x40x5cm and I paid EUR60.00 for it. I cut and planed 4.5x4.5cm pieces out of ot to build the stand.
Americam Walnut edge veneer 2mm thickness
The edge veneer I did order online from Umleimerkom.de on a 50m roll. I had already ordered the edge veneer to craft the wall cupboard for a price of EUR50.00 and there was enough left to be used for the cupboard.
Titebond Cold Press Glue for Veneer
I did previously made good experience with the veneer glue from Titebond so I ordered a gallon of it from Amazon for EUR29.99.
6mm Baltic Birch plywood for the back panels

| Amount | THickness | Length | Width |
|---|---|---|---|
| 2 | 6 mm | 720 mm | 450 mm |
| 1 | 6 mm | 400 mm | 450 mm |
The cost was about CHF18.00 and I did buy the plywood from Coop Bau+Hobby in Switzerland.
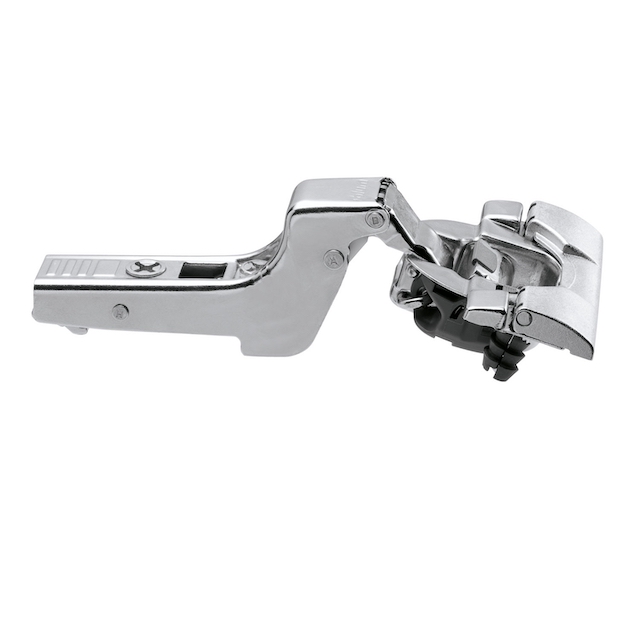
Blum Soft-Close 110° BLUMotion Clip Top Inset Hinges
I decided to use Soft-Close 110° BLUMotion Clip Top Inset Hingesand ordered those from the german online store Lignoshop.de bestellt. The detailed product description is: CLIP top BLUMOTION 110° Innenanschlag 71B3790 Innenanschlag gedämpft, INSERTA and can be ordered using the following Link. Together with the hinges you need additional mounting plates mounting plates 174H7100E Exzenter-Kreuzmontageplatte + Schraube Höhe 8,5 mm 174H7100E Distanz 0 mm.
| Hinge | Mounting Plate |
|---|---|
 |
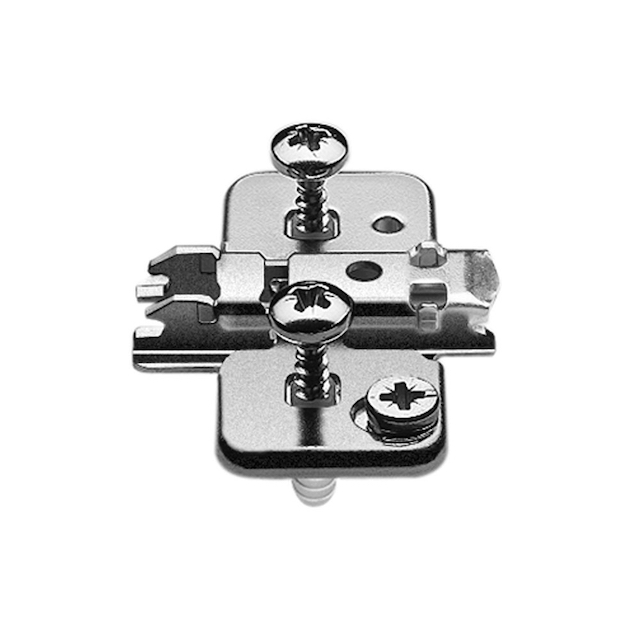 |
Alltogether I paid EUR18.50 for four hinges and 4 mounting plates.
Blum drawer slides
For the drawer slides I did buy the 760H3500S Blum Movento Blumotion S, 40 kg - NL 350 mm. They are 350mm long and can carry up to 40kg of weight. I ordered the slides from Lignoshop.de using the following Link. Additionally I odered the depth adjustments Blum MOVENTO 298.7600 (l/r). You can get them from th following Link.
| Slides | Depth Adjustments |
|---|---|
 |
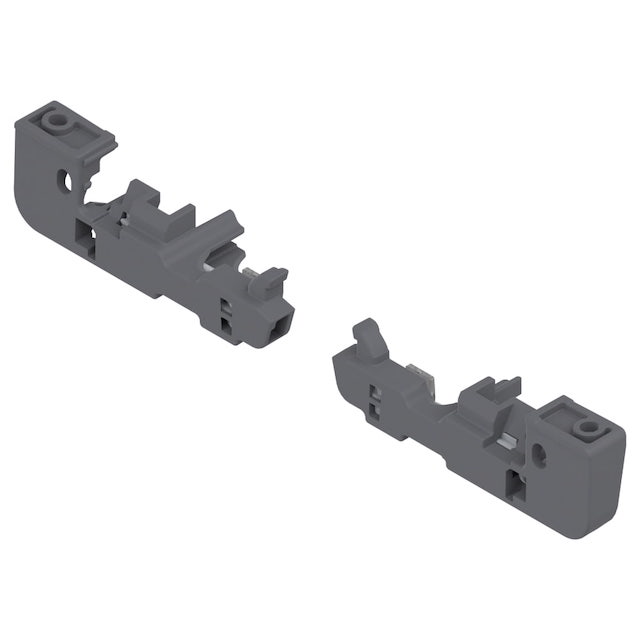 |
For the drawer slides and the depth adjustments for two drawers I paid EUR 55.80.
Handles for drawers and doors
I did search the web quite some time to find something suitable in the 32mm raster which was in black. I ended up using handles from the BORGHAMN provided by IKEA. A two pack cost CHF 6.95 at a length of 170mm which fits well to the walnut veneer.
| Handles |
|---|
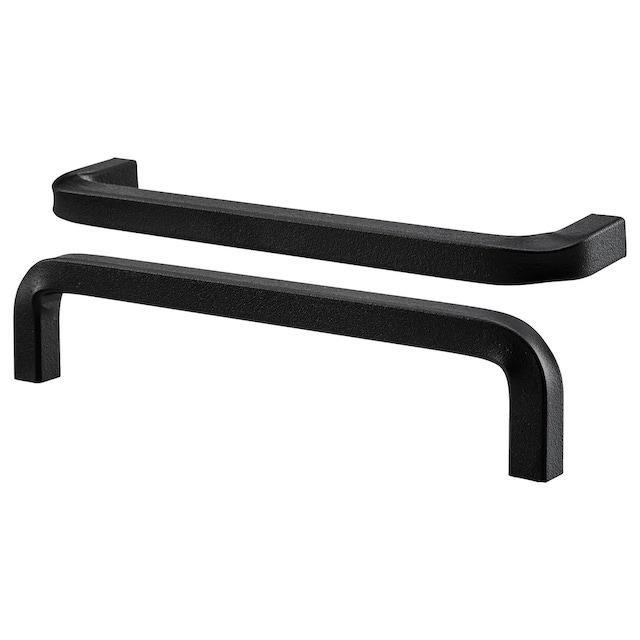 |
Altogether I spent CHF 20.85 on 6 handles.
Milkpaint
After my first experience using milk paint on my boxes, I was thinking to use milkpaint to colorize the backsides on the supboard, the drawers and the shelfs inside the cupboard.
I ordered Miss Mustard Seeds milkpaint from Schatzideko.ch in Switzerland. I used the color Boxwood which should look like box tree green. I ordered the big bag for CHF 36.00.
Kreidezeit Oil
For the surface finish of all parts I used the Oil from Kreidezeit which can be ordered from the following Link from Amazon for EUR 24.40.
Total cost for the material
The total material cost for the cupboard is the sum of the following listed positions:
| Position | Cost |
|---|---|
| Baltic Birch Plywood for the corpus | CHF 150.00 |
| Baltic Birch Plywood for the drawers | CHF 27.00 |
| Baltic Birch Plywood for the fronts of the drawers | CHF 10.00 |
| Baltic Birch Plywood for for the doors | CHF 37.00 |
| American walnut veneer | EUR 196.40 |
| American walnut lumber for the stand | EUR 60.00 |
| American walnut edge veneer 2mmm thickness | EUR 50.00 |
| Titebond veneer glue | EUR 29.99 |
| 6mm Baltic Birch Plywood for the backsides of the cupboard | CHF 18.00 |
| 4 Blum hinges for the doors | EUR 18.50 |
| 2 Blum drawer slides | EUR 55.80 |
| Handles for drawers and doors | CHF 20.85 |
| Milkpaint | CHF 36.00 |
| Kreidezeit Oil | EUR 24.40 |
| Total CHF | 278.00 |
| Total EUR | 435.09 (CHF 472.32 ) |
| Total (calculated with 1 EUR = 1.09 CHF) | CHF 750.32 |
Man hours is not calculated and I really cannot tell how many hours I spend working on the cupboard. I even did list the complete packages that I ordered e.g. for the veneer, the edge veneer and the veneer glue. Out of 24 veneer sheets that I ordered, I used 10 for the cupboard. The edge veneer I did already buy for the wall cupboard and have still 1/3 left. The big bottle of veneer glue is still half full. Moreover I have lots of milkpaint and oil left. Approximately I have spent ~ CHF 620.00 for the cupboard.
Crafting the cupboard
In the following sections I will show and comment on pictures that I took during the build of the cupboard.I was a bit lazy taking detailed pictures of every step of the build so there will be gaps in the process. I started to work on the cupboard in february 2021 and finished it in mai 2021. I the meantime there were even delays in the delivery of the baltic birch plywood which meant that I had to take a short break before I could work on the drawer fronts and the doors..
I start with glueing the edge veneer. When the glue is dry I did plane and sanded it flush with to the edge of the board.
| Adding edge veneer | |
|---|---|
 |
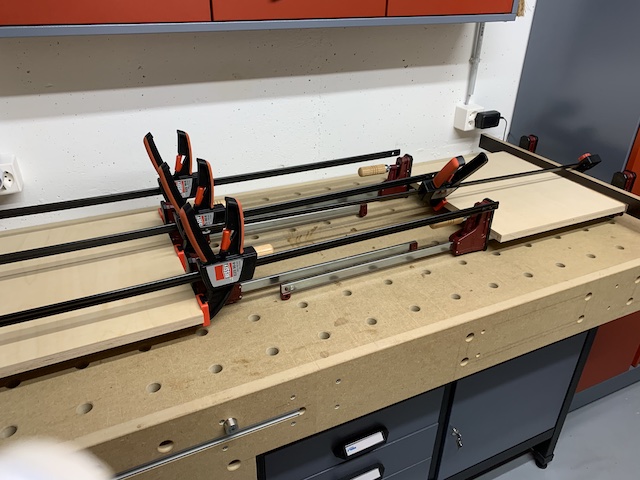 |
I have already described that step in very much detail in the blogpost about the wann cupboard.
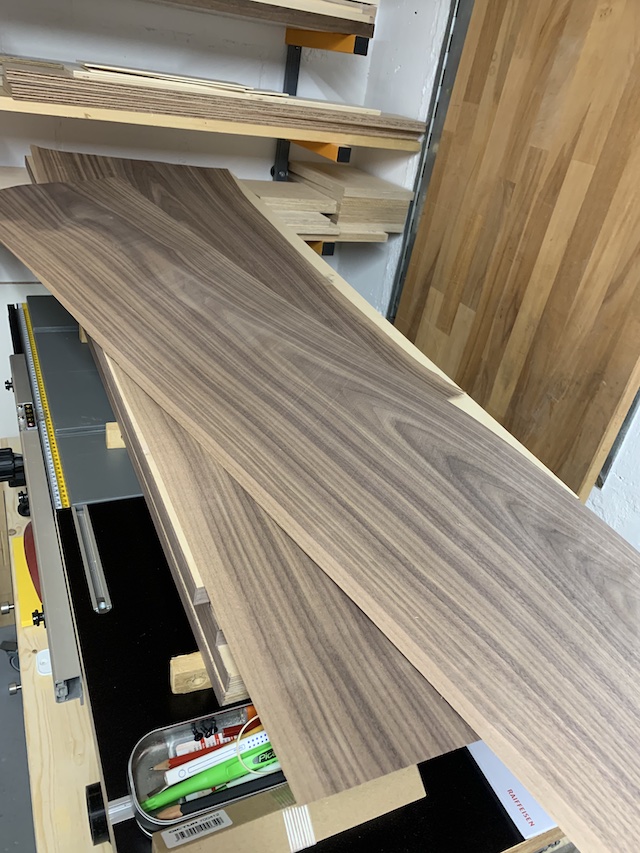
The next step is to cut the veneer sheets to length and plane the edges where they are aligned with each other. I missed to document that process in detail with pictures why I will only show some pictures of the veneet sheets.
| Walnut veneer |
|---|
 |
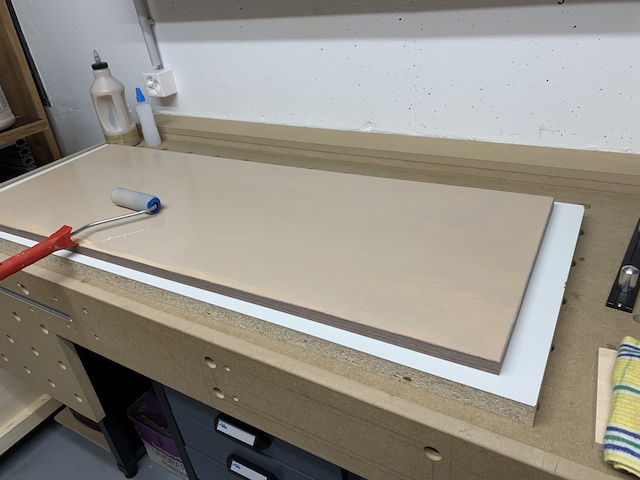
After jointing the veneer sheets together and fixed then together with painters tape I add the veneer glue with a foam roller to the substrate which in my case is the 18mm baltic birch plywood. I made good experience with that procedure. Not too much glue and the veneer is glueed fine onto the substrate.
| Add glue to the substrate | Pressing the veneer to the substrate |
|---|---|
 |
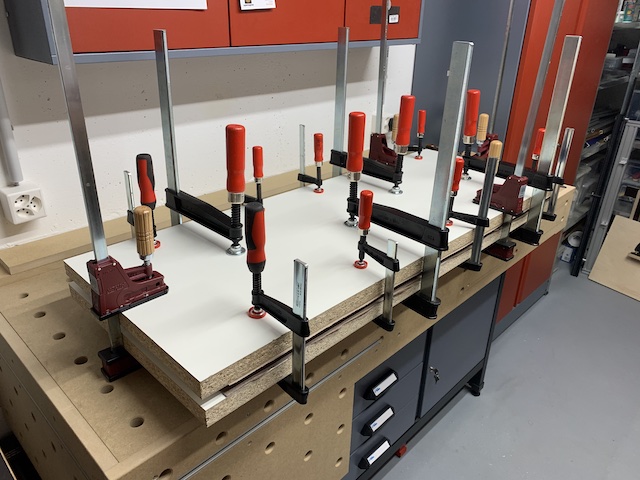 |
Pressing the veneer onto the substrate was again achieved using my improvided but well working press consisiting of 30mm thick melamin coated boards and a couple of clamps. I press the 30mm boards together with clamps as shown in the picture below and let the board dry over night in the press. I repeat that process now for all the boards which are needed to build the corpus of the cupboard. That process took me some days of work since I do that preparation and pressing usually after work during the week. So I was able to create one board per day and it took about a week to get the boards created.
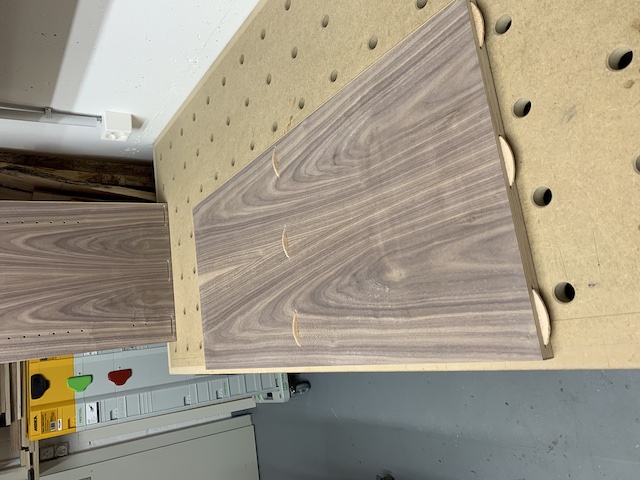
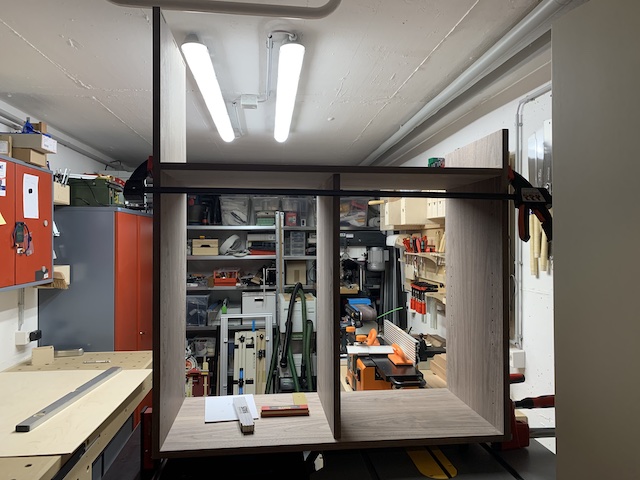
Connecting the corpus boards together was realized using a biscuit jointer and of course glued in biscuits joints. After cutting all joints I put the corpus together without any glue to check everything fits.
| Joints cut | Dry run before the glue |
|---|---|
 |
 |
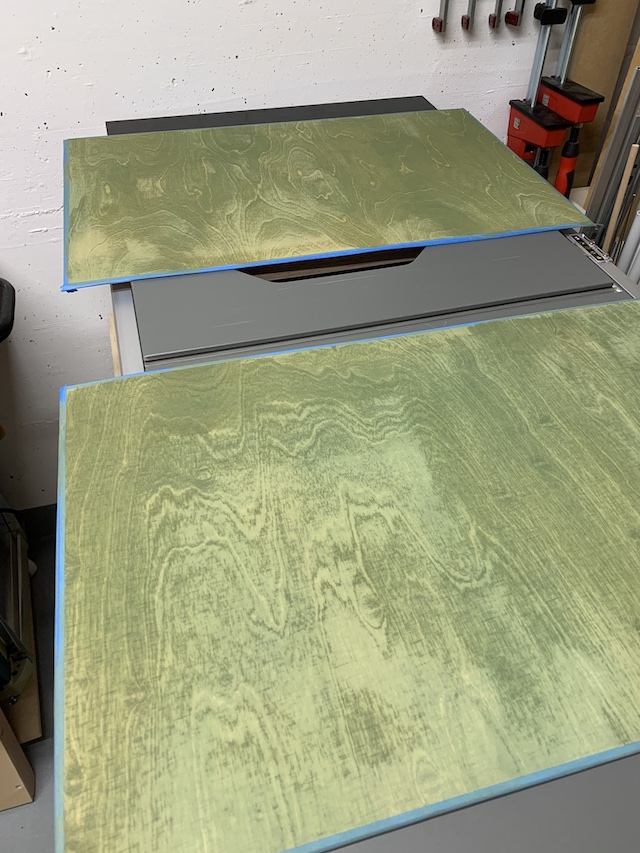
After the cupboards corpus was glued together I painted the backsides with 3 coats of milk paint and finished the surface after drying with hard oil. After the surface finish I used screws to fix the back onto the corpus.
| Added milkpaint | Mounted the backsides |
|---|---|
 |
 |
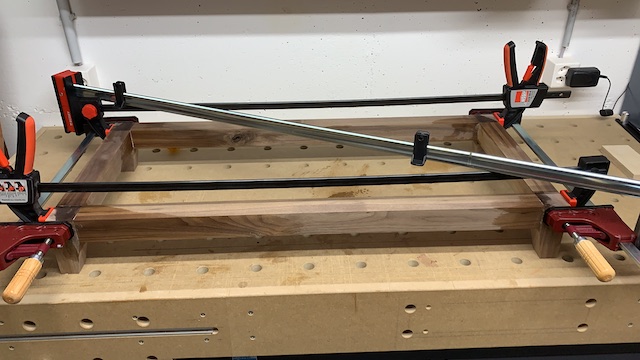
The next step was to cut the pieces for the stand out of a baord of walnus lumber. I cut and planed the pieces to a size of 45x45mm. The stand is 10cm tall and is made of the 45x45mm pieces alltogether. I used my Festool Domino jointer to connect the pieces together. I glued the pieces together and fixed the stand with some clamps while I waited for the glue to dry.
| Stand glued together |
|---|
 |
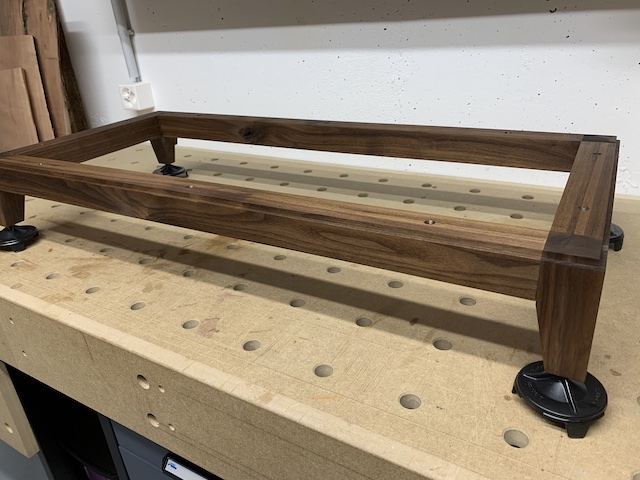
After the glue dried I sanded the stand with grit 120, 180, 240 amd then 320 grit paper, I routed the edge 5mm and drilled the holes to mount it on the bottom of the corpus. Afterwards I added the same hard oil to the stand.
| Finished stand |
|---|
 |
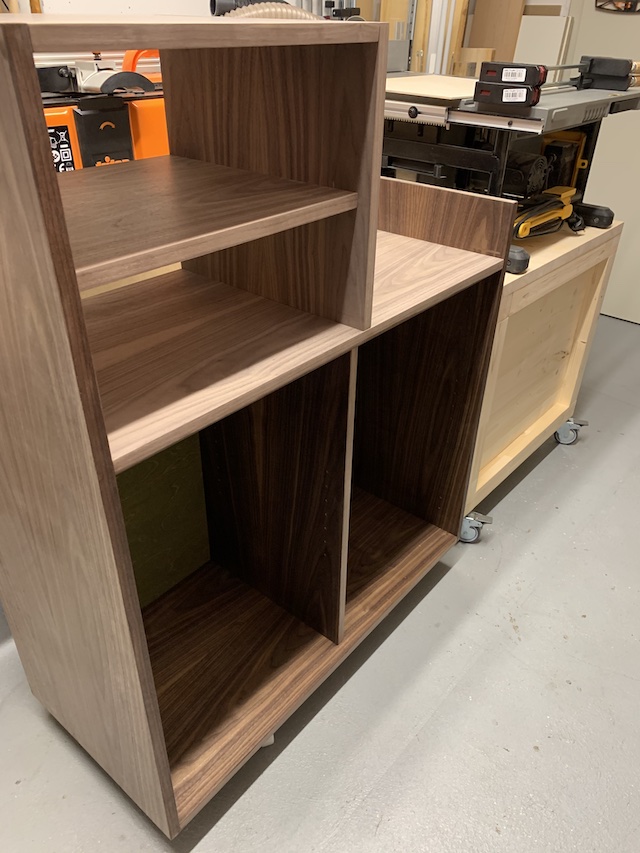
In the meantime I created the backplane behind the drawer area and painted it with milk paint oiled it and fixed it with screws to the corpus. I fixed the stand with screws to the corpus and placed it already to the space into our living room to let the oil hardened.
| Oiled cupboard with stand |
|---|
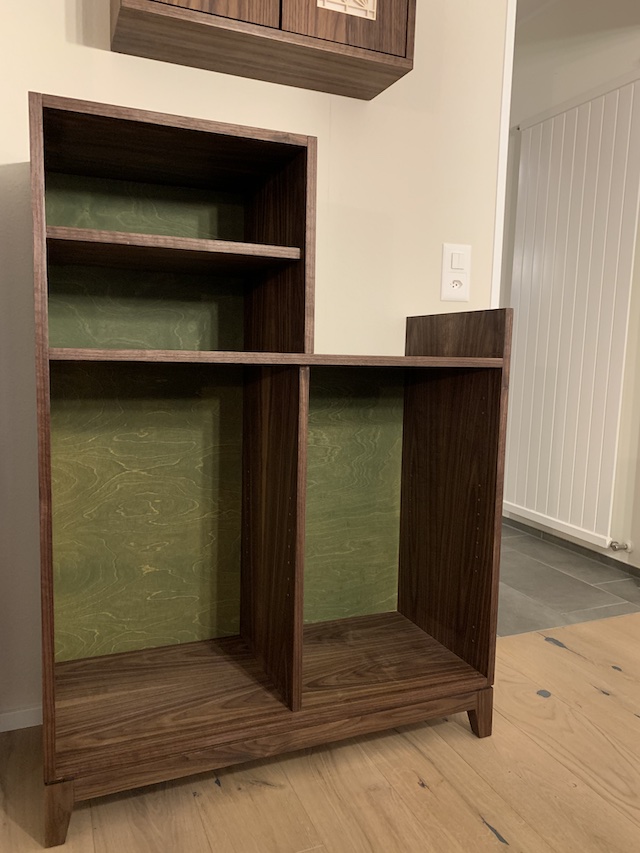 |
I like the contrasting colors of the milkpaint compared to the walnut. In that picture it might be recognizable that I have drilled the 32mm holes for mounting the hinges and the divider boards inside the cupboard.
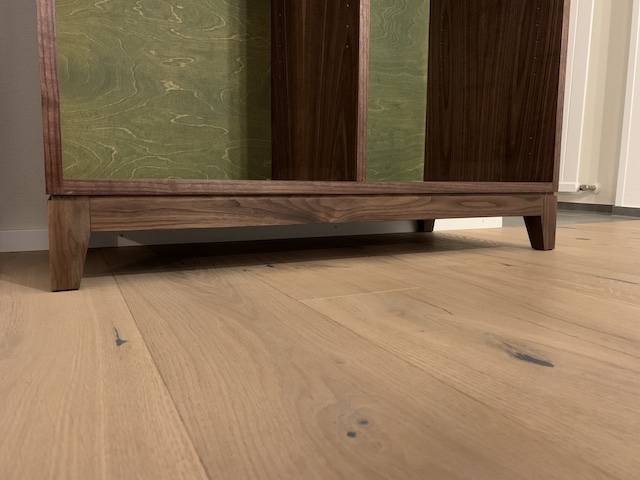
The surrounding rabbet on the stand is a nice design detail and makes unprecision less recognizable.
| Stand with rabbet |
|---|
 |
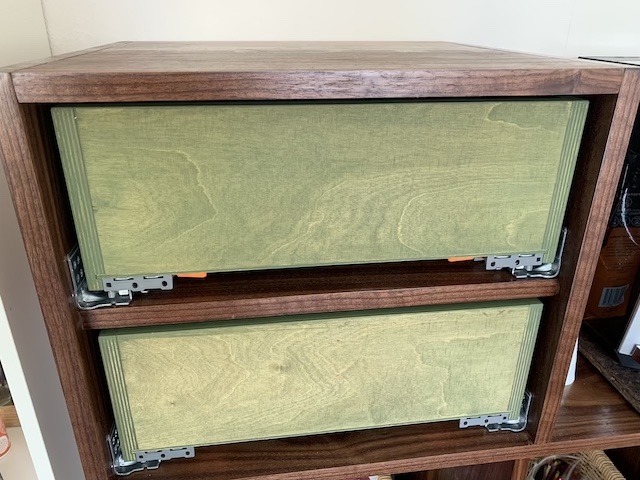
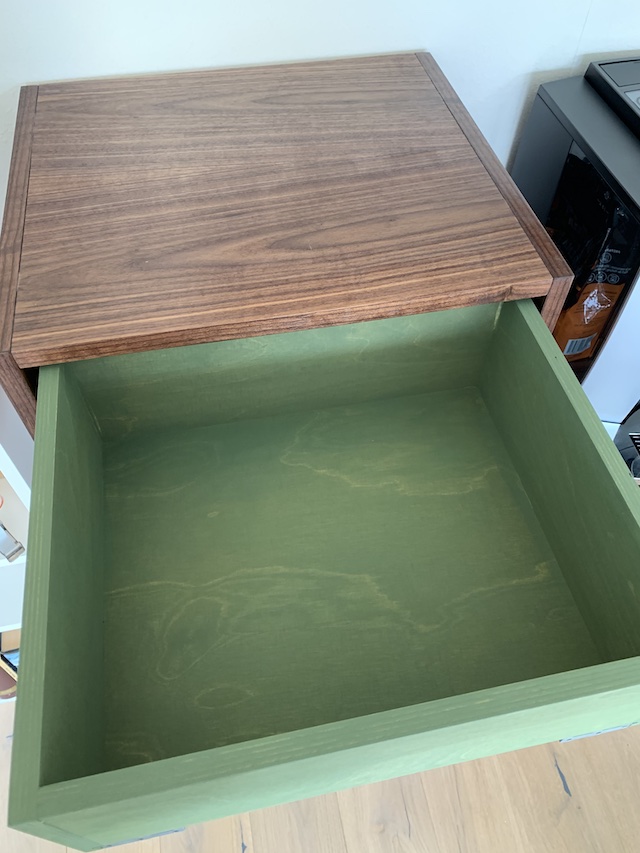
I build the drawers out of 15mm plywood while the base was done out of 6mm plywood. I cut dados to put the bases into the drawer. The drawers were painted with milkpaint and added hard oil to it. Mounting the drawers using the Blum drawer slides was straigtforward and the possibilities to adjust the position in the cupboard was easy to achieve.
| Mounted drawers | Inside view of the drawer |
|---|---|
 |
 |
Since I measured the exact dimensions for the drawer fronts after I mounted the drawer boxes into the cupboard I ordered the wood for the fronts late. Due to delivery delays I did create the fronts out of 18mm scrap plywood that I had on my shop. The material for the doors was a bit more cumbersome to get since I needed to wait for the order of wood. I added the veneer as I did for the rest of the corpus, glued the edge veneer, the surface veneer, sanded and oiled the front pieces and finally fixed the front pieces to the drawers. The gap size is 3mm between the drawer front and the corpus.
| Drawers with front boards and handles added |
|---|
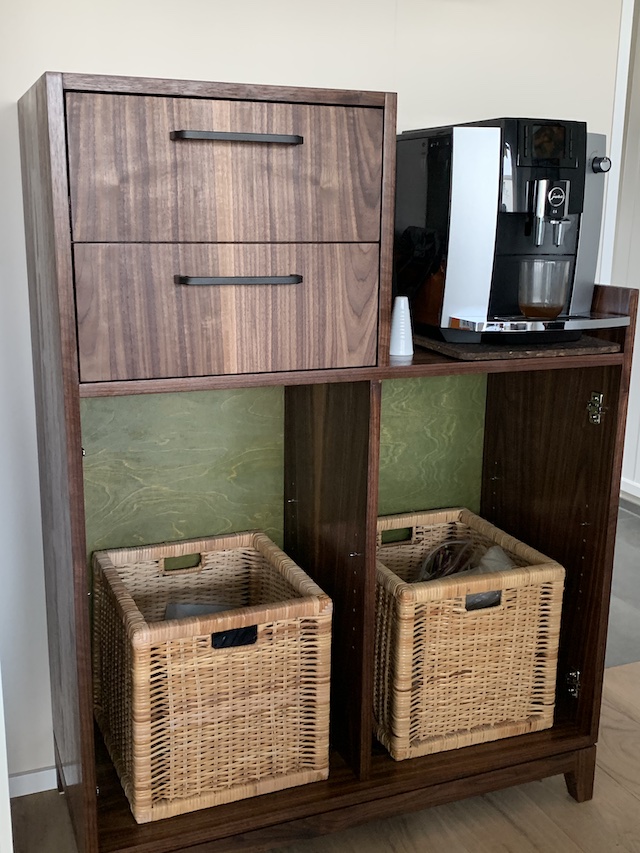 |
After 3 weeks of waiting for the doors I changed the supplier and received the plywood for the doors. Veneers are added as usual. I drilled the holes for the hinges using drill templates from Kreg and Blum.
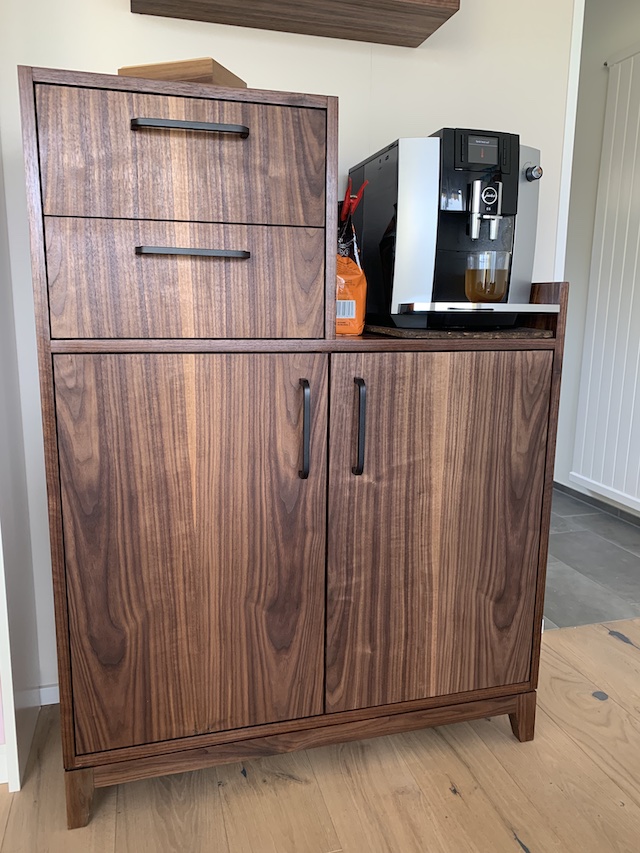
Finally the finished cupboard looks as shown in the below pictures.
| Cupboard | Drawers and doors openend |
|---|---|
 |
 |
A successful project. Here and there a small mistake and gained some routine while doing the veneering of the boards. For sanding the edges it would be nice to use a dedicated edge sander or plane in a future project. The next project will follow soon since the complete high board will consit out of three cupboard of similar width and height.

